Metal Jewelry Making: Ideas, Supplies, and Tools

Metal Jewelry Making is a wonderfully creative process. Adding metal elements to your design punches up the bling factor in your jewelry designs and provides endless opportunities to let your creativity soar. Metal working in jewelry ranges from very simple techniques to more complex and elaborate designs. This hub will share some of the simpler techniques and tools I use in my metal jewelry making. The tools and supplies presented are not an exhaustive list by any means. They are simply the materials used in the projects chosen to illustrate various simple metal-working techniques.


Basic Tools Required for Metal Jewelry Making
- Round-nose pliers
- Chain-nose pliers
- Wire cutters
- Mandrels – They are barrel-like graduated cones. They are available in different sizes allowing the creation of perfect loops and wire coils.
- Round objects – markers, small bottles
- Ball-peen hammer
- Steel or rubber bench block
- Wire jig
- Metal file or rough sandpaper


Basic Supplies Required for Metal Jewelry Making
- 12 gauge (ga) copper wire. Wire gauge refers to the thickness of the wire. The lower the gauge, the thicker the wire.
- 18 to 20 ga copper wire
- 18 to 20ga silver wire
- Head pins
- Eye pins
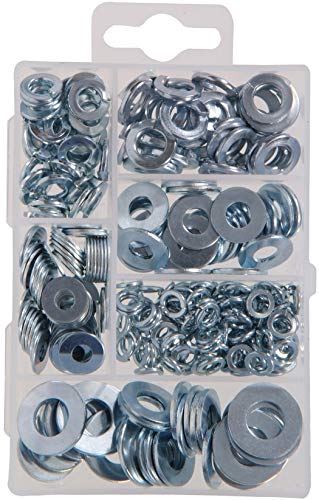
- Washers of various sizes (cheapest when bought in bulk at a hardware store)
- Beads

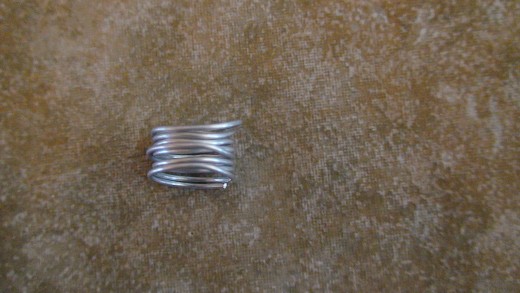
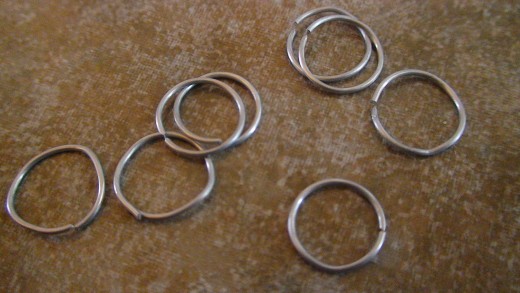
Making Jump Rings
Click thumbnail to view full-size


Creating the Textured Washers and Assembling the Textured Washer Earrings
Click thumbnail to view full-size


Projects Used to Illustrate Basic Techniques use in Metal Jewelry Making
Washer Earrings:
This project illustrates the technique of metal hammering for texture and the creation of custom jump rings.
Tools for this project:
- Ball-peen hammer
- Steel bench block
- Mandrel
- Chain-nose pliers
- Round-nose pliers
Supplies for this project:
- 4 small silver washers
- 2 ear wires
- two 5mm diameter jump rings
- 18 ga silver steel or aluminum wire
- 2 medium sized beads and two small round beads
- 2 head pins
Procedure:
- Tightly wrap a length of 18ga silver-colored wire around a mandrel with a ½ in or 12mm diameter several times. Each single coil will make one jump ring. You will need 6 of these jump rings.
- Cut the coil from the main spool of wire and remove the coil carefully from the mandrel.
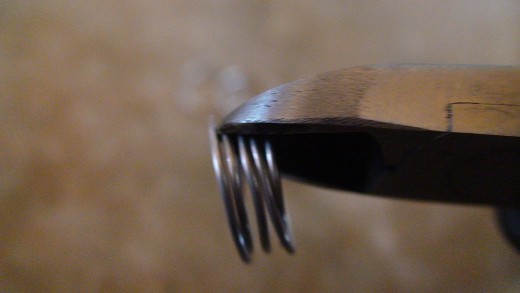
- At the outer end of the coil, look for the wire end and using flush cutters, cut through all of the rings, one or two at a time. Each jump ring will have the inner diameter of the mandrel used.
- Place a washer on the steel block.
- Using the ball end of the ball-peen hammer, repeatedly strike the washer on one side. Note: always grasp the hammer firmly near its end. This assures that you are using the weight of the head to create texture and reduces the impact to your hand and arm .
- Repeat steps 4 and 5 for each of the remaining three washers.
- Thread your small round bead followed by your medium sized through a head pin and make a small loop at the top using round-nose pliers.
- Repeat step 7 for the second head pin and bead set.
- Place two washers, one on top of the other with the textured sides facing the same direction and connect the two using two of the 12mm jump rings you just created. Open and close the jump rings using the two pliers.
- Repeat step 9 for the remaining two washers.
- Attach a third 12mm jump ring to one of the washers and attach this to one of the bead sets.
- Repeat step 11 for the other bead set and washer set.
- Using a 5mm jump ring, attach an ear wire to the two jump rings on the washer-bead set.
- Repeat step 13 for the other washer-bead set.

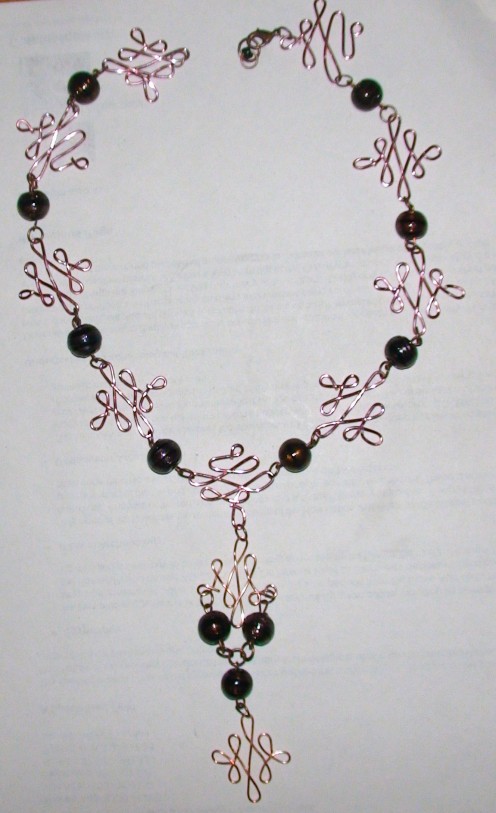
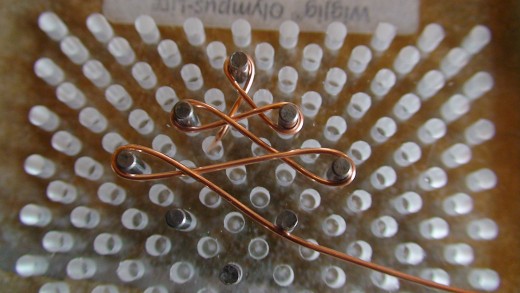
Creating a Celtic Connector with a Wire Jig and Assembling the Necklace
Click thumbnail to view full-size


Celtic Wire Jig Necklace:
This project illustrates the use of a wire jig to make metal connectors.
Tools for this project:
- Wire jig
- Chain nose pliers
- Ball-peen hammer
- Rubber bench block
Supplies for this project:
- 18ga copper wire
- 11 medium sized round beads
- 22 copper 7 mm jump rings
- 1 copper 10 or 12 mm jump ring
- 11 copper eye pins
Procedure:
- Place jig over the template that came with the jig for the Celtic design. If no template came with the jig follow the pattern outlined in the photo for step 1. Place the pegs in the holes with dark circles.
- Place the end of a foot long piece of 18ga copper wire in a peg hole of the jig below the top peg and wrap the wire around that first peg.
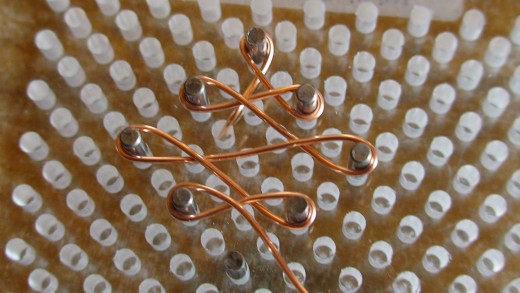
- Continue wrapping around the pegs following the pattern outlined in the photos and diagram.
- Remove the design from the jig and clip both wire tails using flush cutters.
- If necessary grasp the end of the wire with chain nose pliers and tuck the tail gently into position so it lies within the neighbouring loop.
- Flatten and strengthen the Celtic connector by hammering it with the flat end of the ball-peen hammer on the rubber bench block.
- Repeat steps 2 to 6, making 11 Celtic cross connectors.
- Thread each round bead onto a copper eye pin, making a second loop at the end of the pin.
- Connect the elements in the following order: Celtic connector connected to round bead with a 7mm jump ring. Note: See diagram for the best orientation of the Celtic connectors which will produce less stress on each cross and prevent the crosses from pulling apart when the necklace is worn.
- Repeat step 9 adding 8 more Celtic connectors. The last element added should be a Celtic connector.
- On the fifth connector (the middle one) add a Celtic connector to the bottom loop with a 7mm jump ring.
- Connect a bead element to one of the middle loops of the connector with a 7mm jump ring.
- Connect a bead element to the other middle loop of the connector with a 7mm jump ring.
- Connect a jump ring to the bottom loop of each of those bead elements just added.
- Connect one 7mm jump ring to the two jump rings just added.
- Add a bead element to the single jump ring added in step 15.
- Add a 7mm jump ring to the last Celtic connector and connect it to the bead element added in step 16.
Creating Wire Forms and Adding a Bead to make Earrings
Click thumbnail to view full-size


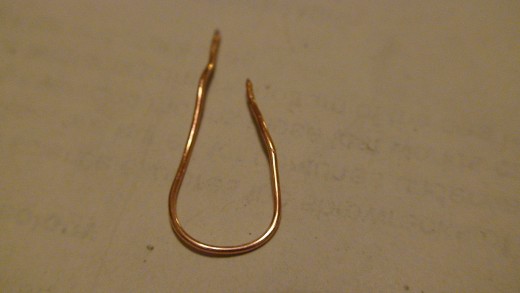


Wire form earrings:
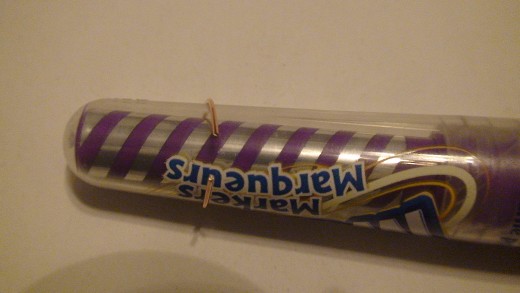
This project illustrates the technique of wire forming using a mandrel or other round object such as a large marker.
Tools:
- Flush wire cutters
- Round pliers
- Chain-nose pliers
Supplies:
- 18ga wire of your color/metal choice
- Two beads
- Two ear wires
- Two small jump rings
Procedure:
- Cut two 18ga pieces of wire 3 inches in length.
- Wrap the wire around a large Sharpie or other large marker.
- Insert a bead onto the wire. You may need to reshape the curved wire to accommodate the bead. Don’t worry if the wire becomes asymmetrical.
- Form a small loop using the round pliers on both ends of the wire.
- Repeat steps 2-4 for the second wire piece.
- If necessary bend the loop so that it is asymmetrical.
- Using a small jump ring of the same color/metal as the wire or one made from the same wire, attach the wire/bead element to an ear wire.
- Repeat step 6 for the second wire/bead element.
Note: This design is much more pleasing to the eye if the wire/bead element is asymmetrical.
What is your favorite metal jewelry project?
Do not worry if your metal elements differ slightly. When using the wire jig, not every connector will look exactly like another made with the same pattern. When working with your hands, modifying the bend or curve of wire pieces, variability will be the rule and will add to the charm of your piece. By all means modify the instructions I have provided above and use the various elements in your own unique, creative way. As always, enjoy the creative process!
Discover More Metal Jewelry Techniques

See My Other Jewelry Making Hub for Instructions on Basic Jewelry Making Techniques
- Instructions on How to Make Your Own Themed Charm Bracelet and Necklace
It is often difficult to find what you're looking for when trying to match jewelry to your wardrobe and style. Try making your own pieces to fit your clothing style and preferred colors. The instructions I've provided for a themed charm bracelet and
Related

★ Jewelry Metalsmithing Techniques | Beginner's Tutorials For Sheet Metal and Wire Working ★

Free Jewelry Making Tutorials: Crafting Handmade Pins, Bracelets, Necklaces and More

How to Make Silver Charms From Metal Clay for Personalized Handcrafted Jewelry Gifts

Using EnviroTex Lite Resin For Jewelry Making


